|
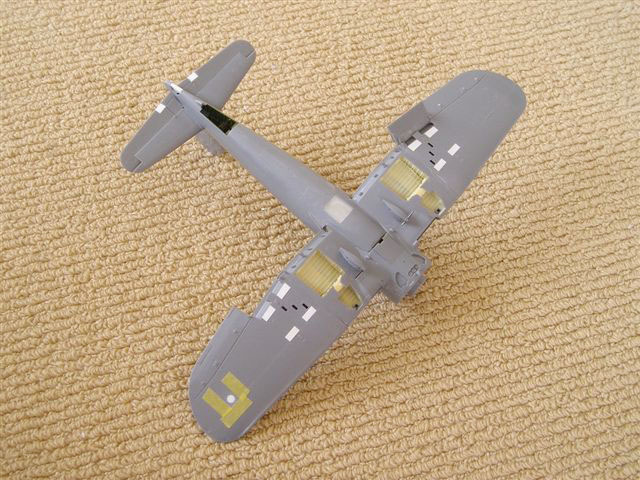
Next my attention turned to the wings. I ground the centre section wafer thin and inserted the Aires wheel wells which look awesome, some filling was done on the rear bulkheads and the upper wing sections attached. I shimmed the belly window for a more precise fit and buffed it smooth after glueing. It was then I spotted that the centre section wouldn't fit as the Aires tub was hanging down too low. Again I ground both parts to within a micron of ruining them! I glued the two together and shimmed the gap where the wing fuselage fairing didn't meet up properly. The whole lot was sanded smooth and any areas filled with superglue. Kiwi FG-1D's had the rear half of the tailwheel area closed up and no cut out for the hook. I cut the doors in half and used plasti card to panel it the same as per the original. Elevators were then removed, shimmed and filed to an angle and the trim tabs removed and replaced in a 'popped up' position as per the real plane when they are drooped, new horns and actuators were fashioned and MEK used to glue it all up. The front ring was sprayed dk grey with white misted over to simulate the light grey finish inside there, the rest int green. This unit was attached to the airframe and covered over with Tamiya tape to stop dust etc getting in. Back to the cockpit again and I made a new armoured glass panel that is situated behind the windscreen that was cut and trimmed to shape, dipped in Future and a black frame painted around the outside edge. The windscreen was not the best of fits so I shimmed the bottom and superglued it on and sanded it to a better profile and scollaped the lower edge out to more accurately portray that area.. That was then glued in and the windscreen masked ready for paint.
Back to the wings, and thin plasticard plates were added to the lower wing for the rocket stub attachment points. A friend gave me the spare stubs off his Accurate Minatures Avenger as they look far better than the kit ones. The leading edge wing tank fillers were filled and sanded as was the light on the lower wing (this is only on very early Corsairs). When the outer wing halves were assembled they were trimmed/sanded/trimmed/sanded until I got a perfect fit. The inner joint was reinforced with card and they were glued up and sanded/buffed smooth. I went over the whole airframe with a fine tooth comb and treated any areas. The aerial lead in was
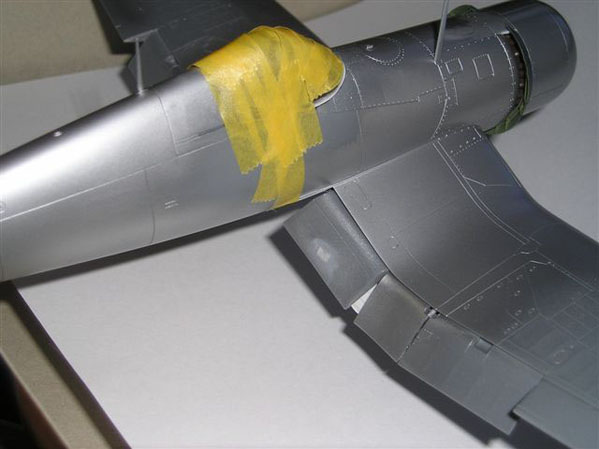
removed from the starboard side (behind the cockpit) and moved
to a new location on the port side as per later marks. I now primed it with Tamiya AS11 run through the airbrush and any areas fixed. I buffed it all with Micro Mesh in prep for the blue.
Now to paint. I use automotive Laquer as it has such a fine pigment and vary the tone to give depth/wear. I dont tend to pre shade but lay the base down and lighten and streak as per photos afterward with a very thin mix.
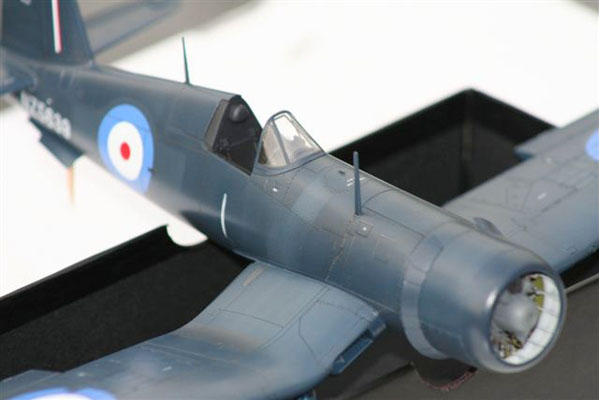
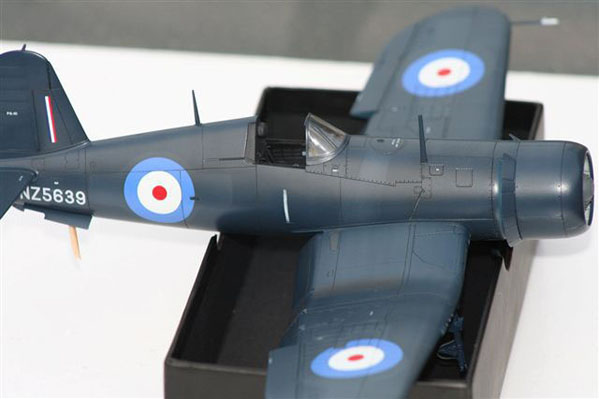
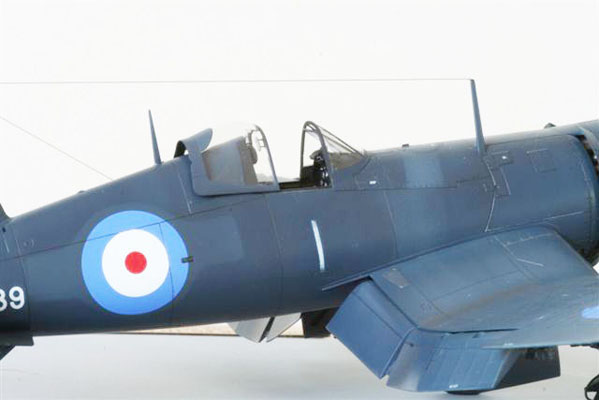
The pacific barred roundels were overpainted back in NZ and I made up 6 paper masks and airbrushed the "shape". Once I was happy with the paint(which took aaaaages) It then was time to decal. My dear friend Pete Mossong (to whom I am indebted to for his awesome decals) made me up the stencils and serial which performed perfectly. The roundels were a combination of airbrushing and Ventura's Pacific Corsair sheet. I used a circle cutter and cut Blue "rings" out of it and overlaid them on the white. I then sprayed Pollyscale satin over it and Pete persuaded me to go matt (thank goodness you did as it looks waaay better). Again the silver pencil was used, and all the little details were finally added. I added several levers and mirrors inside the canopy as well as thinning the rear edge to a more scale effect. Finally 2lb fishing line tinted dk grey at work was added and she was done.
I hope you get some tips for your own projects and enjoy it as much as I did.
Pictures and text by Anthony Galbraith.
PLM 2009 |

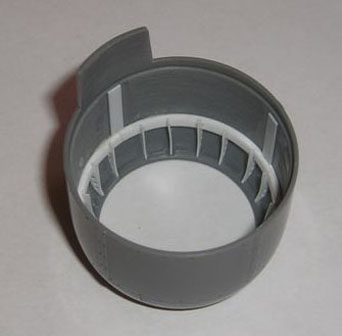
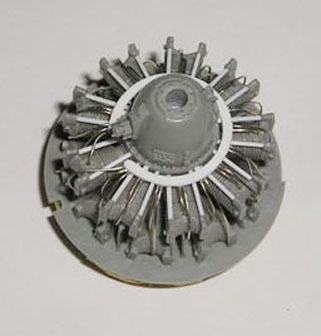 Next I decided to detail the inside of the cowl flaps as per photos(I think there are about 70 parts in there!). The Quickboost engine needed an ignition harness and various ammounts of plumbing/plug lines etc. When this was done I started detailing the cowl interior and added 36 ribs(each with 4 lightening holes drilled in them) and various other bits and pieces.