|
Combining
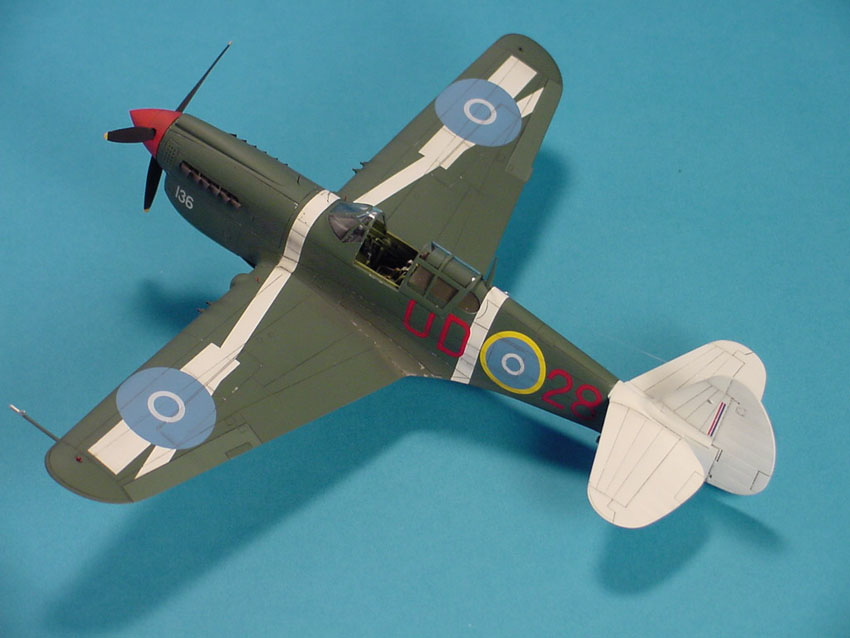
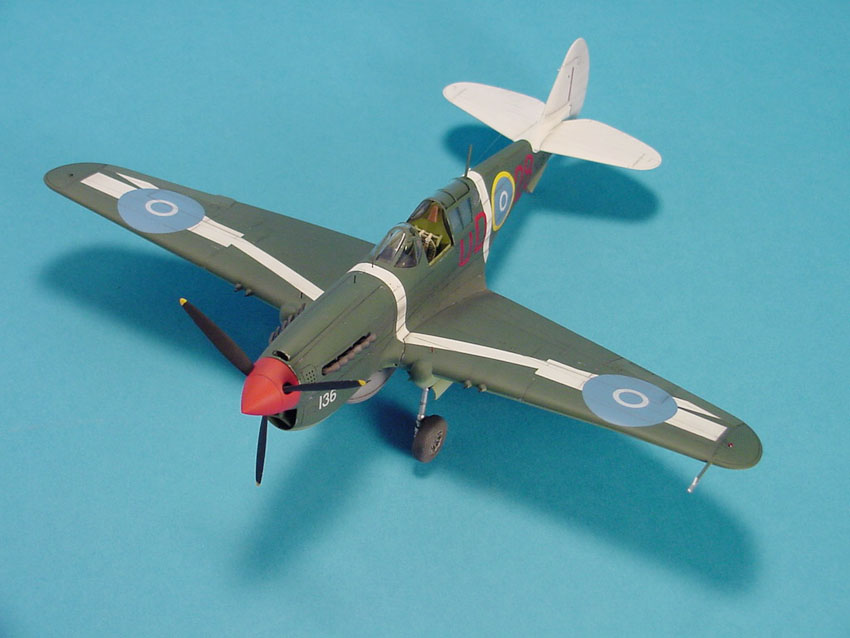
the AMT/ERTL CURTISS P- 40N and P- 40K Warhawks to produce a P- 40N-1
Kittyhawk, of No. 4 Operational Training Unit, while stationed at Ohakea,
New Zealand in late 1944 to early 1945.
I
suspect that most aircraft modellers are much the same, in that the choice
of subjects we build is largely driven by the markings or paint scheme.
I can state with 100% honesty that I am scheme driven in my choices
and when I first saw the markings for this P-40 offered on an older
Ventura decal sheet number 4864, it became a subject that I really wanted
to build. It was only after I
started to look deeper into the subject that I realized it would not be
quite as straight forward as first thought.
You see, this variant of the P-40 is a P-40N-1, which was the
light-weight member of the P-40N family.
There are small and subtle differences between the N-1 and later N
variants, which I was not aware of until I started digging through my
references. As I go
through this build article, I will highlight the differences on the slim
chance that you may elect to add a P-40N-1 to your display case.
I started this model back in 1997, shortly after I had purchased both the
AMT/ERTL P-40N and the AMT/ERTL P-40K, as well as the Ventura decals.
The fact that it took me 10 years to finish the model is a
testimonial to my lack of focus, glacial building pace and constantly
shifting interests. If memory
serves me well, the only aftermarket accessory then available for the
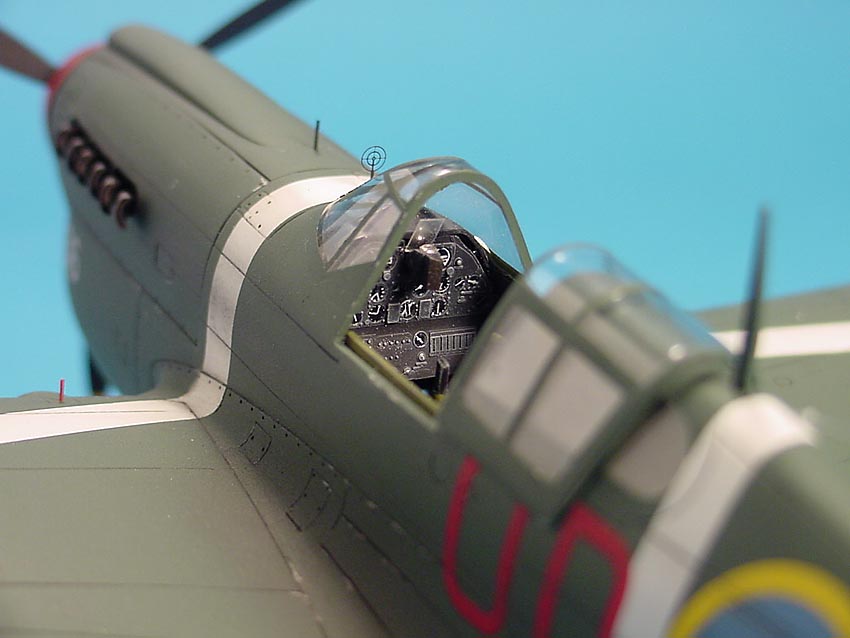
P-40N model was the Eduard photo-etch set 48-222.
For those not familiar with this etch set, it features 82
parts on one fret of brass, along with the usual photo-negative instrument
dial faces. A nice
addition to this set is the choice of 3 different instrument panels, so
depending on the production block, modellers can choose between the
P-40N-1,5,10,15,20,25,30,35, and 40. The
remainder of the fret covers the cockpit area, primarily the
seat and seat belts, map case, trim wheels, throttle quadrant,
canopy hand crank and rudder pedals. Screening
is provided for the radiator intakes by way of three pieces for each
intake. Two choices of cowl
flaps are provided, one set open and the other closed (neither of which
fit the kit to my satisfaction). Landing
gear details consist of tow rings, wheel well tops and sides and new
landing gear doors all around. Final
details include the drop tank hardware, bead gun sight and underwing bomb
racks.
You
may be asking what does the P-40K have to do with building a P-40N-1 and
the answer is quite simple. The
P-40N-1 features the long fuselage of the later P-40N's, but has a cockpit
configuration of the earlier P-40K and M, as it does not have the cutdown
fuselage behind the cockpit. In
addition, the pilot's greenhouse is a combination of components from the
P-40K and later P-40N's. So,
you need to utilize parts from both kits to end up with the N-1 variant.
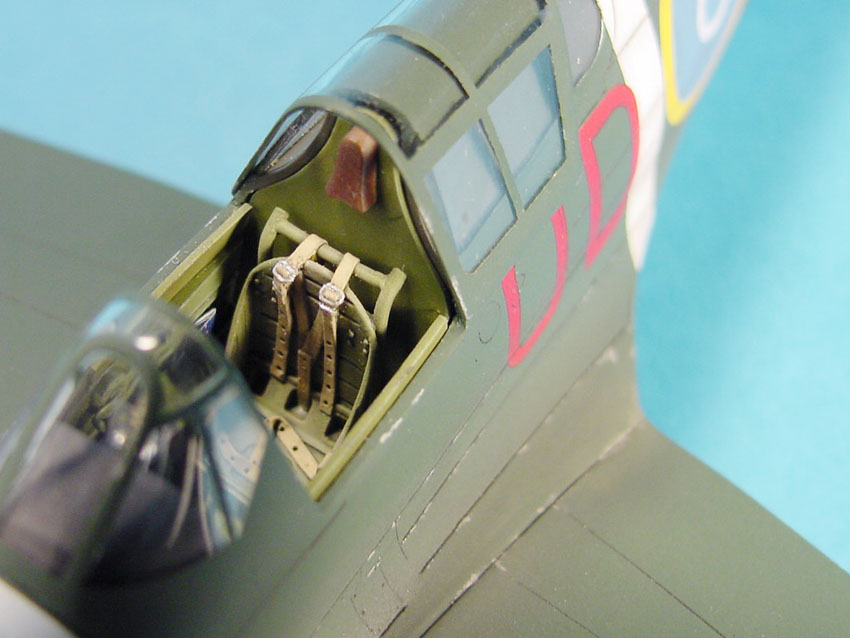
The first modification involves replacing the cockpit rear armour plate,
part number J1 from the P-40N with the corresponding part from the P-40K.
After this, it is just a simple matter of completing the cockpit
with whatever amount of detail you wish to add.
The pilot's seat is another item that needs to be changed to
accurately model the early P-40N-1. The
kit seat is the square back style, found on later P-40N's and is best
replaced with an Ultracast resin seat that has the round top, which was
used on all variants of the P-40, up to and including the P-40N-1. I had
no way of knowing with any degree of certainty if the RNZAF P-40's had the
British Sutton harness, or the U.S. style of harness, so I opted for the
Sutton. (Ed
note: All RNZAF P-40's from the K on had the US type belts)
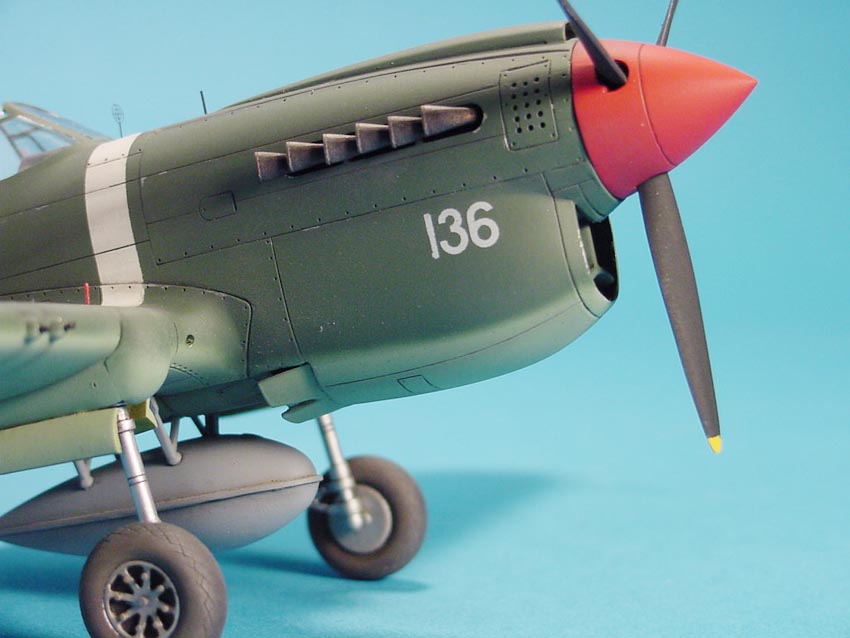
The
most visible difference between the N-1 and later N variants relates to
the wing guns. The N-1 had
only two guns per wing, with the outboard gun on each wing being deleted.
Interestingly, the gun access hatch on the underside of the wing
was not changed on the N-1 and still retains three shell ejection ports.
Also,the bomb rack attachment points have been filled in, as the
N-1 variant did not have provisions to carry any underwing ordnance.
If you are using the Squadron P-40 Warhawk in Detail number 62 as
reference, be advised that the scale drawings of the P-40N-1 wing on page
71 are incorrect, as they show the inboard gun removed.
However, a photo of an N-1 on page 64, clearly shows that the
outboard gun is the one that was removed.
(Ed Note: All operational RNZAF N-1's had the
outboard gun refitted)
The wings can then be assembled as usual and if so desired, the wheel
wells can be enhanced by way of the Eduard etch.
AMT/ERTL moulded the wheel wells with only 3 sidewalls in each,
with the inboard side absent. To
eliminate this see-through look I fabricated sidewalls from sheet styrene.
When you go to mate the assembled wings with the fuselage, you will
find that the wing is too flat and lacking dihedral, thereby precluding
the wing from meeting the fuselage at the wing root..
By cutting a "V" shaped notch in the front of the lower
wing, part B3, you can gain enough flexibility to pull up the wings so
they will meet at the wing root.
Once
you resolve that problem, turn the model over and look at the gaps on the
bottom at the trailing edge of the wing.
I used strips of styrene to fill these gaps and then smoothed them
over with Tamiya putty. After,
all the lost panel line detail was rescribed.
Truth be told, I had not experienced such poor fit since my days of
building the old Revell 1/32 aircraft back in the 80's.
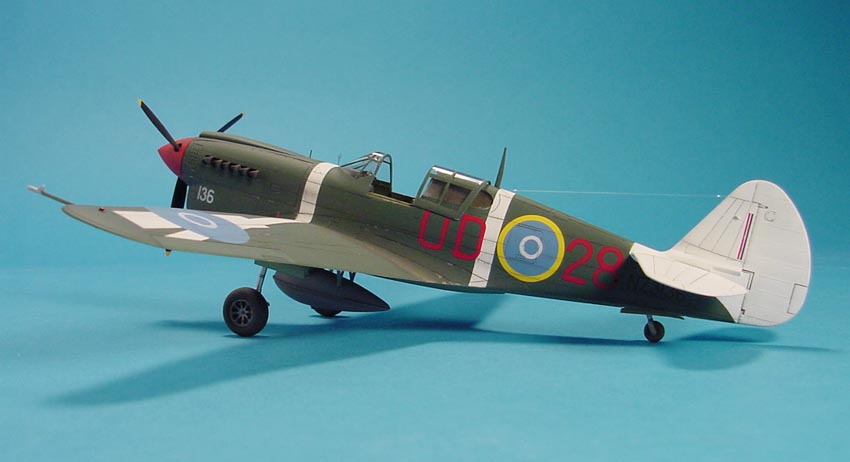
Depending
on your references, this particular aircraft was either painted Olive Drab
over Neutral Gray (Ventura decals), or Foliage Green over Grey Green
(RNZAF, The First Decade by Charles Darby).
I opted for the Foliage Green paint scheme, for no other reason
than it seemed to follow suit with other P-40’s that had been relegated
to the training squadrons. Irrespective
of which colours you choose, the
very first step in applying the camo, is to paint the area behind the
quarter windows with Olive Drab, which
was the colour in which the P-40
was originally delivered when brought on charge on July 8, 1943 at
Hobsonville, New Zealand. Once
that is done, the canopy can be glued in place.
On the topic of the windows, I
used the windscreen from the P-40N, along with the sliding canopy and rear
quarter windows from the P-40K. Actually,
the sliding canopy is moulded too thick to sit correctly on the rear
decking and was used as a master to vacuform a thinner replacement.
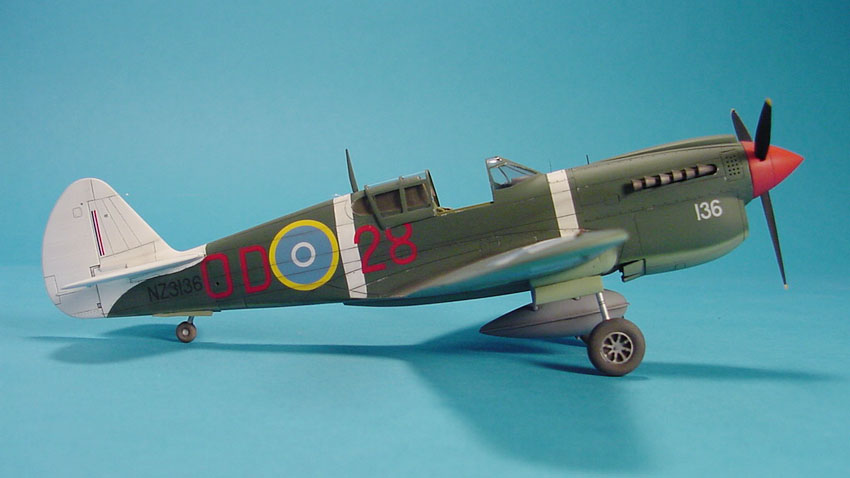
With the entire airframe assembled, painting is the next step, with white
being the first colour applied. The
entire rear empennage along with areas where the white bands and national
insignia are located were airbrushed with Testors gloss Classic White and
then masked off. I prefer this
white to Insignia White as I feel the Insignia White has a bit of a yellow
cast once dry. I also painted
the entire area of the wing national insignia, as past experience with
Ventura decals has shown that they are extremely thin and as a result are
a little translucent, which would have created opacity problems where the
national insignia overlaps the white wing bands.
The
Foliage Green and Grey Green were next to go on.
Foliage Green is an Australian/New Zealand equivalent of U.S.
Medium Green FS 34092, but is not identical in shade, with an FS
approximation between 34092 and 34096, while the underside Grey Green is
very close to FS 34128. My
preferred brand of paint, specifically Xtracolor does not offer paints
mixed to the Australian and New Zealand specifications, but I did find
very good matches, with X391 French WWII Vert Foncé falling in the needed
Foliage Green FS range and X620 MiG 29 Light Green being an almost exact
match to FS 34128. I also
airbrushed the fabric covered ailerons with lightened X391 to simulate the
different paint fade, common between metal and fabric areas.
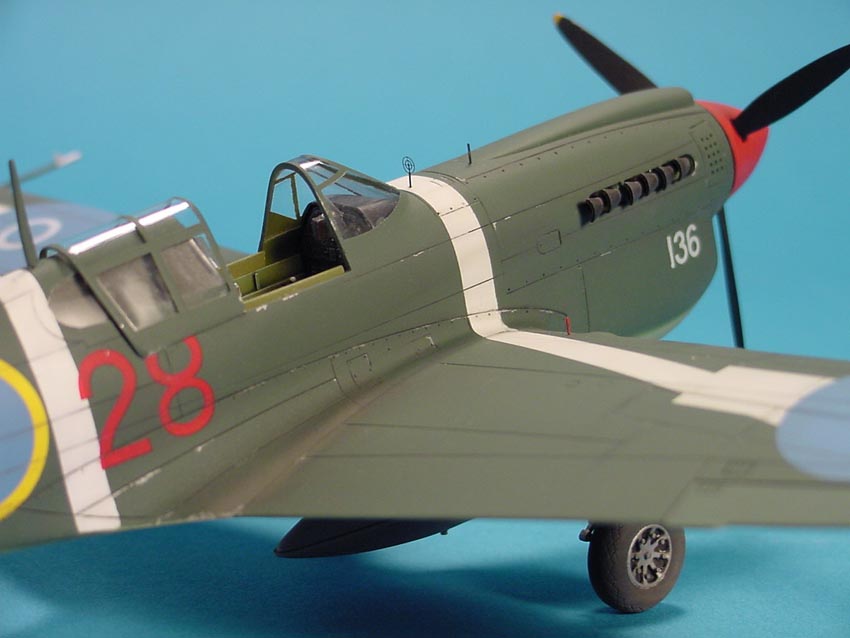
Decals
were next and the very first decal I applied was one of yellow fuselage
roundel rings, however it refused to settle onto the gloss finish, even
though I tried Solvaset, Gunze Mr. Mark Softer and the Micro Scale system.
As I thought it might be an anomaly, I tried one of the red codes
and one of the blue wing roundels and both of them refused to settle onto
the model surface. This was
perplexing as I had used Ventura decals in the past with no problems of
any kind. So I was at a
crossroads, as the model was modified and painted up to represent an N-1.
To the best of my knowledge there are no other N-1 decal options
offered by the aftermarket companies and I did not wish to strip the model
and repaint as the generic N-1 shown on pages 64 and 65 in the Detail and
Scale.
Considering
the time and money which I had invested in this model, I thought a few
more dollars should be thrown at the model and I contacted a custom decal
company to produce a set of markings using the ALPS printing system.
One drawback with the ALPS system is that it cannot cleanly print
some colours such as light blue and yellow as they will be pixilated.
This meant that I would need to now paint the blue areas of the
national insignia and either paint the yellow ring to the fuselage roundel
or find another decal. For
the blue, I used Xtracolor X164 BAC5070 Presidential Flight Dark Blue and
an IPMS Canada decal sheet on 442 squadron Mustangs provided the yellow
rings. Finally things were
looking up.
I mixed up an oil paint wash of dark grey for the upper surface and medium
grey for the underside. The
AMT/ERTL P-40's have well defined panel lines that accept the wash well
and make the application trouble free as long as you don't apply your
camouflage colours too thick. Using
a 000 brush I applied some silver paint chipping in the usual areas of
wear. A few coats of Testors
Dullcoat to result in a flat finish and provide some tooth for the chalk
pastels followed all this.
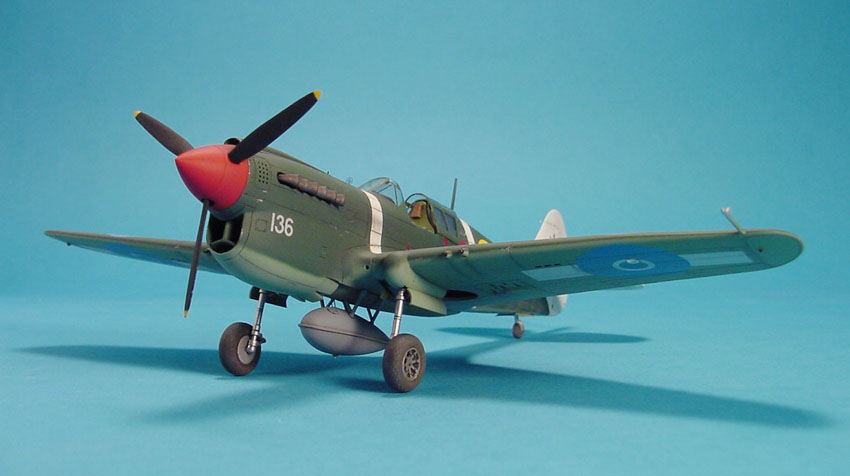
Luckily
for me I did not finish this model earlier, for if I had it would have
been modelled with incorrect exhaust manifolds.
AMT/ERTL provides the style of exhaust with the simple round pipes.
In reality, this subject should be fitted with the flared exhausts,
which Ultracast released a few years back.
The Ultracast are a dramatic improvement over the kit pieces as
they are designed to be installed after all painting is done, unlike the
kit pieces which need to be installed from inside before the fuselage
halves are assembled
One of the other distinguishing features of the P-40N-1 was the
introduction of the smaller (27" diameter) lightweight magnesium
wheels, but AMT/ERTL does not provide this type of wheel in their line of
P-40's. Luckily the Eduard (ex
Mauve) P-40N has an extra set which worked quite well after filling the
axle mounting hole with styrene rod and then drilling it out to match the
size of the AMT/ERTL axle stub. As
luck would have it, shortly after I completed the undercarriage on my
P-40, Ultracast released a nice set of resin lightweight wheels.
Maybe I do build too fast afterall.
It
was time for the final details such as the landing gear position indicator
rods made from piano wire and painted red, wing gun barrels made from
pieces of hypodermic needles and a Waldron photo-etched ring sight.
An important thing to remember when installing the bead and ring
sights is to have then slightly off-centre to the right and not on the
fuselage centreline as AMT/ERTL would have you do.
The landing light was replaced with a suitably sized MV Products
model railroad lens, which was glued in place with a drop of Kristal
Kleer.
Another
minor but important addition is the installation of some canopy rails
along the cockpit sills. Using some strip styrene, I made two rails that
dropped into place and did much to improve the cockpit opening.
This simple step took all of 5 minutes.
After this, the model was weathered with various shades of green, grey,
black and brown chalk pastels, while ground up pencil lead was rubbed into
the paint along the wing roots and along the leading edges of the
propellor blades. A stretched
sprue antenna wire was added and the navigation lights were painted
crimson red and a very dark blue green.
I am of the opinion that these lights should look closer to black
with a red and green tinting, rather than the garish reds and greens a lot
of modellers prefer. I guess
navigation lights along with the way other modellers treat clear parts are
two of my biggest peeves when I am looking at models on the competition
table.
This
completed my P-40N-1 and while I am sure there are numerous other small
details I could have added, but after 10 years, I had had enough and just
wanted the model finished. I
have encountered troublesome builds in the past, but this model was more
troublesome than most and fought me at every step of the way.
However, it was not great modelling ability that helped me overcome
twisted wings, flat dihedral, mould shift, inconsistent details, generally
bad fit and poor decals. Au
contraire. It was my stubbornness and inherent cheapness.
Does it rank as one of my better models?
Not at all, but I like it just the same.
I compare it to the mother that has an ugly child.
She knows that the child will never win a beauty contest, but she
loves it just the same. Or to
put it into another context…no matter how much you polish a turd, it
will always be a turd.
I
can't tell you too much about the operational history of the actual
aircraft. What I do know is
that NZ3136 was delivered to New Zealand on board the ship 'James Hogg'
and brought on charge on July 8, 1943 at Hobsonville, New Zealand and
ultimately disposed of on March 2, 1948.
At one point in its operational career it was assigned to No. 17
Squadron in the Solomons and was credited with some of Squadron Leader Guy
Newton's 5 victories. After
this, the aircraft was transferred to No. 4 Operational Training Unit
based at Ohakea, at which time it received its white ID bands.
References:
Detail and Scale No. 62, P-40 Warhark part 2, by Squadron Publications
RNZAF,
1937-1946. The First Decade, by Charles Darby
Information
provided by Peter Mossong

PLM2008 |