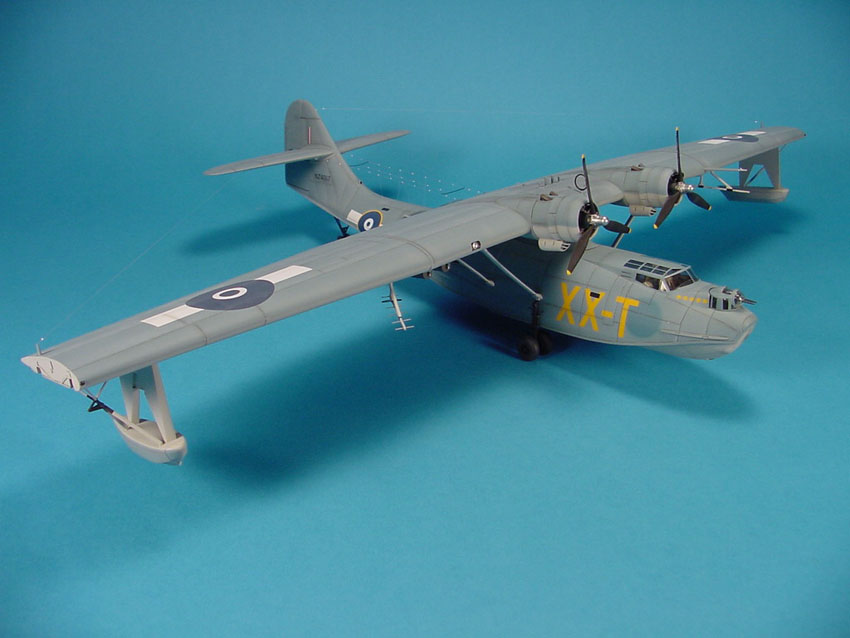
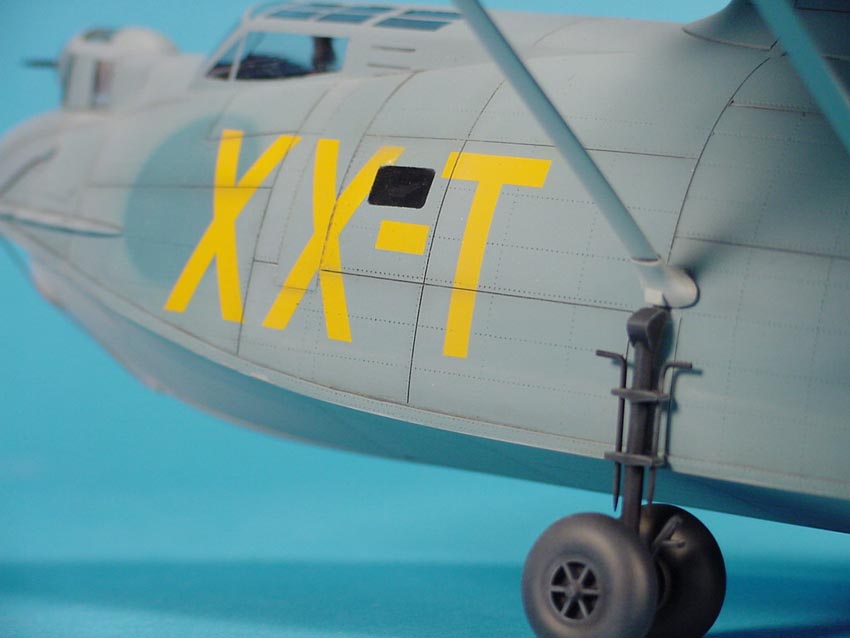
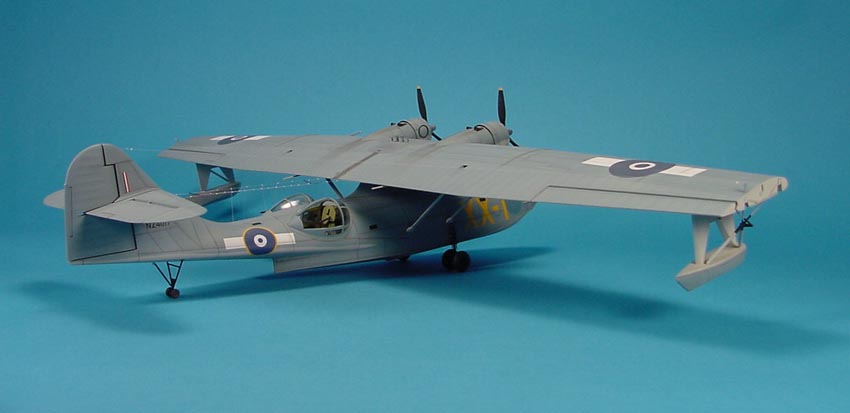
Using the Monogram 1/48 kit of the Consolidated PBY-5 to model a Royal New Zealand Air Force Catalina piloted by Flying Officer D.S. Beauchamp of 6 (Flying Boat) Squadron, while stationed at Halavo Bay, Florida Island, Guadalcanal during December 1944.
I
have three
modelling
buddies (two in Canada and one in the U.S.) who along with myself
compete in a mini bi-annual
modelling
challenge. We each select a
subject, or theme that we must build a kit to comply with.
Our selections are then written on a secret ballot.
Actually,
one of my business cards. That
way each ballot is identical and lends a semblance of credibility to the
selection process and when drawn by a waitress at a Hooters restaurant,
no one can complain that she was swayed by the appearance of an abnormal
ballot. We do this once in
the spring at a U.S. Region I Convention and once in the autumn at a
small show in upstate New York. Who
ever does not finish his model in time for the next drawing, must buy
dinner and drinks for those who do finish their model.
A couple years back the subject chosen was
"floatplanes" and this proved to be the incentive I needed to
build a Catalina, a subject that I had long desired to have in my
display case.
As
with most kits, construction usually begins with the cockpit and the PBY
is no exception. However, I
usually cleanup all parts and perform any modifications or enhancements
prior to actually following the instructions.
With the 18 pieces which Monogram has provided you have the
basics to produce a more than adequate cockpit out of the box, and
considering what is actually visible through the canopy once the model
is complete, any additional detailing could be considered superfluous.
The Monogram name has long been synonymous with detailed
interiors and the Catalina attempts to continue the trend.
I did use a True Details resin cockpit set in my model, but not
out of necessity. It was
more due to the fact that I had the set and would most likely never
build another PBY, so I had better use it in this instance. In my
opinion it is totally unnecessary, as it all but invisible once the
model is assembled and any money spent on the detail set is better spent
on beer. Sadly the True Details set enhances the cockpit, which is the
one area where you cannot see the results, but offers nothing for the
more visible waist gun compartments.
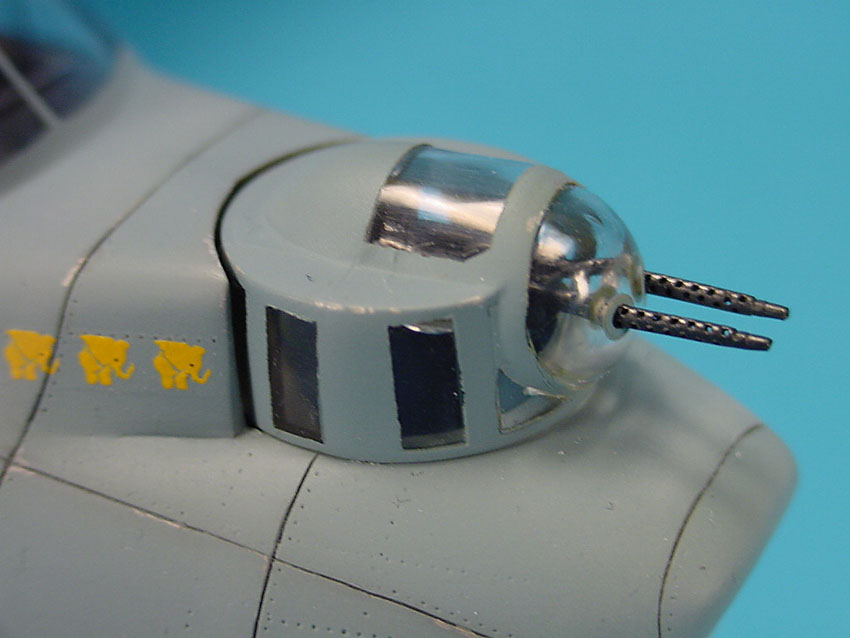
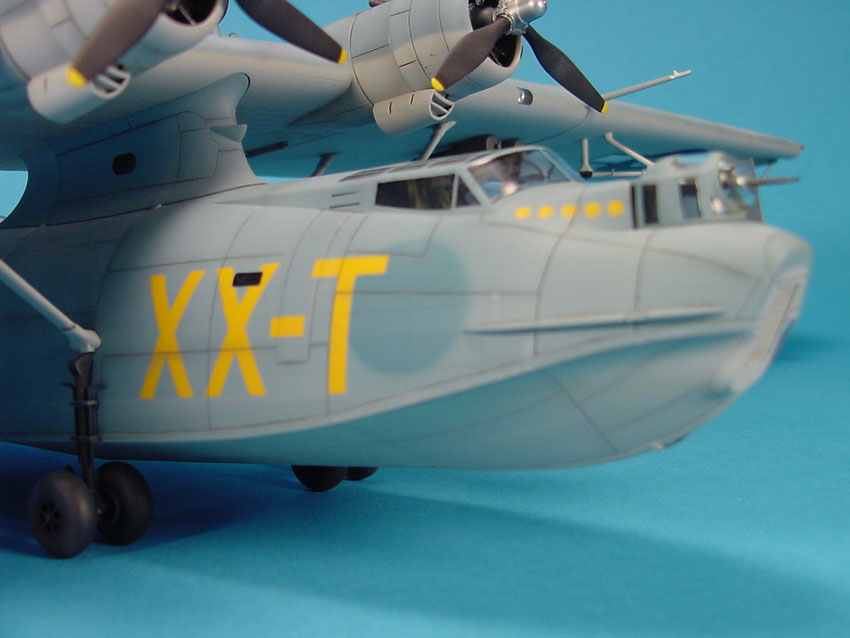
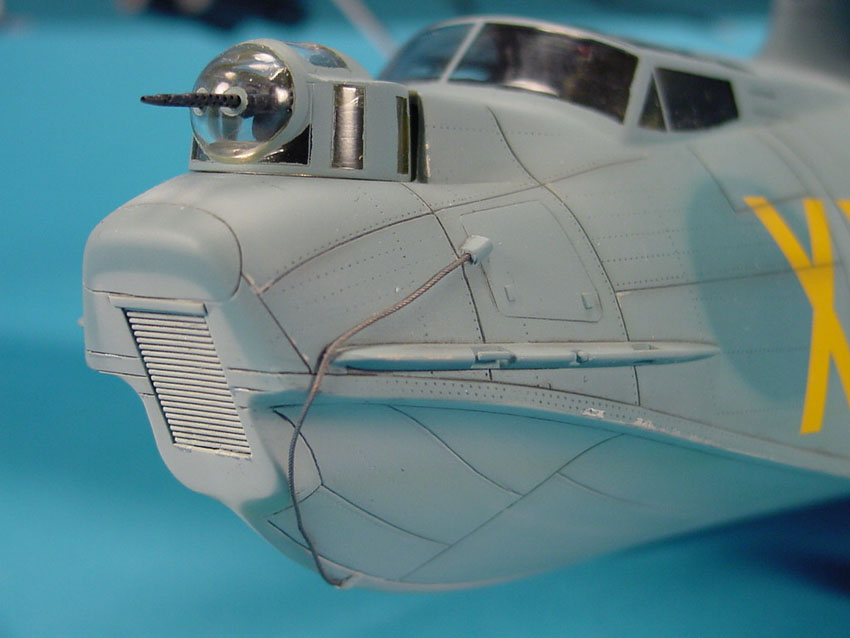
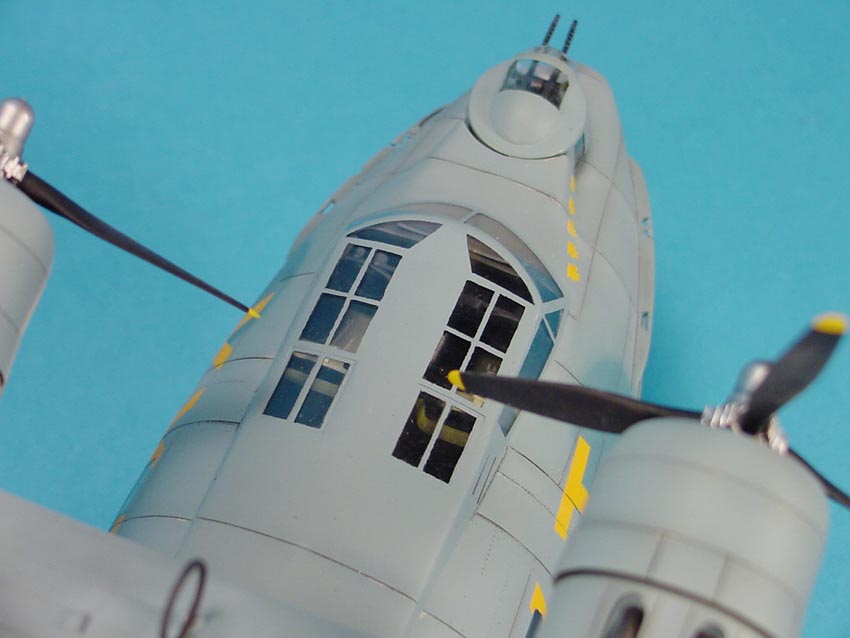
With the front offices taken care of, I started to focus on the waist gun positions. From the beginning it was my intention to model the aircraft with the waist blisters in the open position and consequently, I felt that additional detail in the form of ribs and stringers would be mandatory. This is one area where I feel that Monogram "copped out" in the detail department. What ribs they did include are rather indistinct, tend to just fade away, missing any longitudinal stringers and are peppered with ejector pin marks. I sanded off all the detail and fabricated new ribs and stringers using plastic strip. This area was then given the same paint treatment as the cockpit.
It never ceases to amaze me how much of an improvement you can
realize with just a little extra time spent with some plastic strip and
an airbrush or paint brush. To
add a little visual interest to the waist gun positions, I added a LIFE
magazine decal on the floor, by the chemical toilet.
It is hard to see, but some people have spotted it.

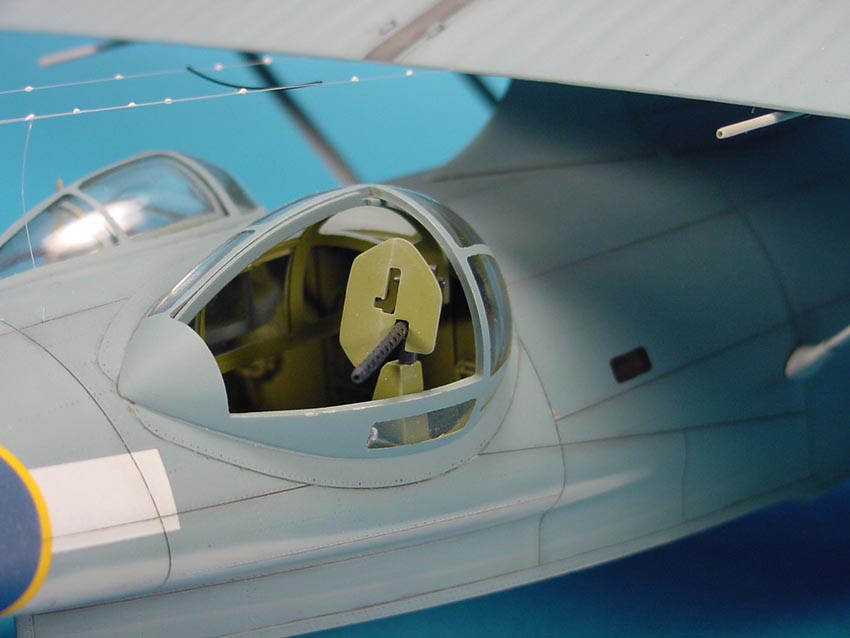
I
next installed the various small windows, which are inserted from the
inside and these all fit quite well.
From the outside, I applied a heavy application of superglue to
all the windows and when dry, they were sanded and polished to give them
that 'blended in' look. This
is something many modellers neglect to do and in my opinion it can ruin
the look of the clear parts as they will either sit proud, or be
recessed from the surface of the fuselage and in some cases, there are
large gaps around the perimeter of the windows, all of which can detract
from the overall appearance. A
little extra time here, is time well spent.
We all have our pet peeves, and clear parts are my biggest peeve,
irrespective if they are canopies, side windows, or navigation lights
With
the front and rear cockpits completed, it is a simple matter to set them
in place and close up the fuselage halves.
The two halves do fit well, but I suggest you glue it in sections
to ensure proper alignment and eliminate any steps from one side to the
other. There are a couple of
areas on the fuselage which will require some attention before you can
go much further. They are
slightly recessed patches in the areas where the nose wheel well and
main undercarriage legs would be on the amphibious PBY-5A versions.
This is a result of the moulds serving dual purpose and having an
interchangeable insert. Once
you sand these areas smooth to eliminate the mould seam, you will most
likely have eliminated a large number of the recessed rivets in the same
areas. Don't despair, as
this is an easy fix. Simply
brush some liquid cement over the area and the recessed rivets will
magically reappear. Albeit,
a bit more shallow than before, but there nevertheless.
I
openly admit that the tail is a little too thick and should be corrected
using the Belcher Bits corrected tail, but I passed on this correction
for one simple reason...namely the time constraints of the bet.
I just did not feel that I had sufficient time to install the
resin tail section cast by Belcher Bits and to add the surface detail
needed to mimic the kit.
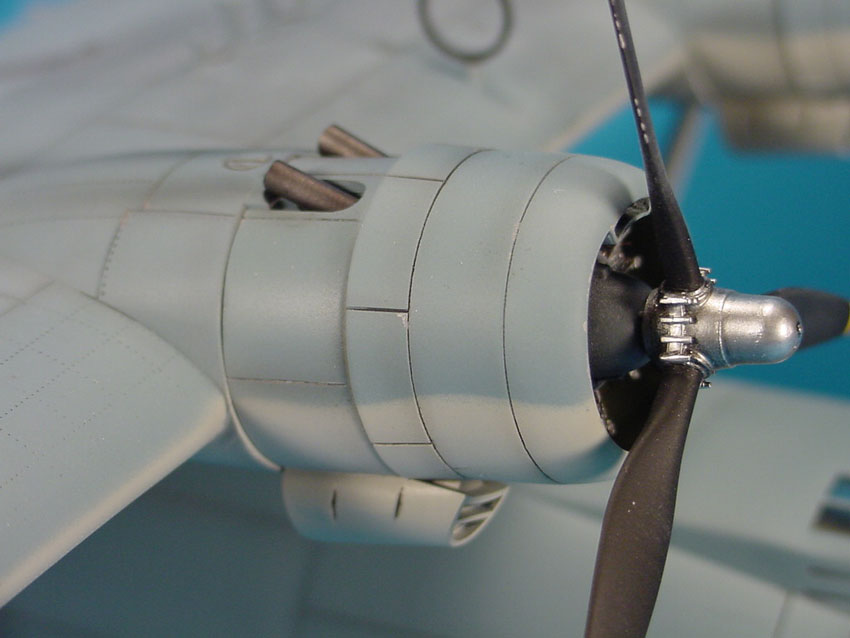
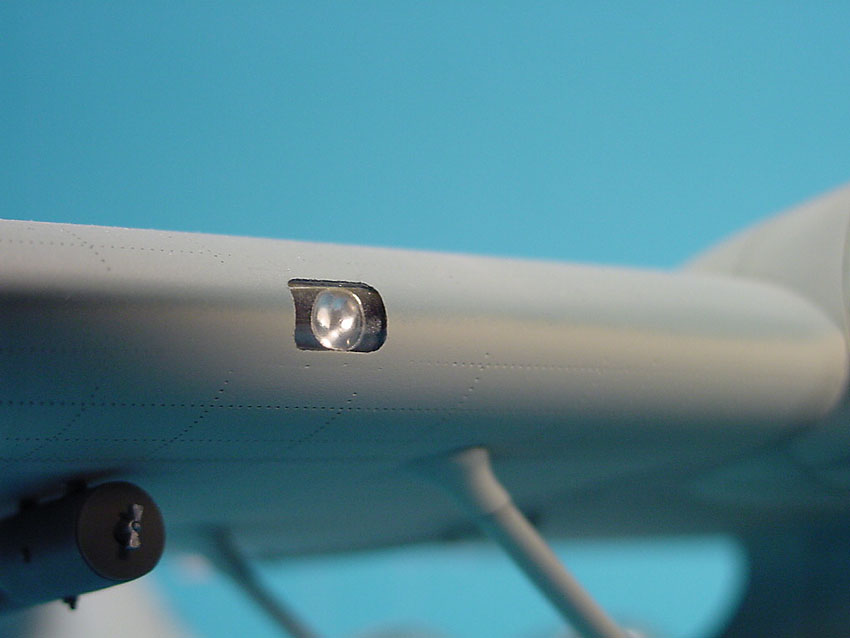
The main wing consists of five principal parts, plus the engine and engine cowling assemblies. There are no fit problems with the wing and only needs some putty to fix the large divets resulting from the heavy sprue attachment points. I installed some MV Products lenses in the landing light openings and fastened the clear covers, which were subsequently blended in to the wing. The pitot tube was drilled out and the three assist handles were made from piano wire and added to upper surface of wing.
The engines were painted with Metalizer Steel, and given a black wash of India Ink. I like using India Ink on my engines as it dries with a shine that gives the engine that wet, oily look. The only detail to be added to the engines was the ignition wires that were made from armature wire.
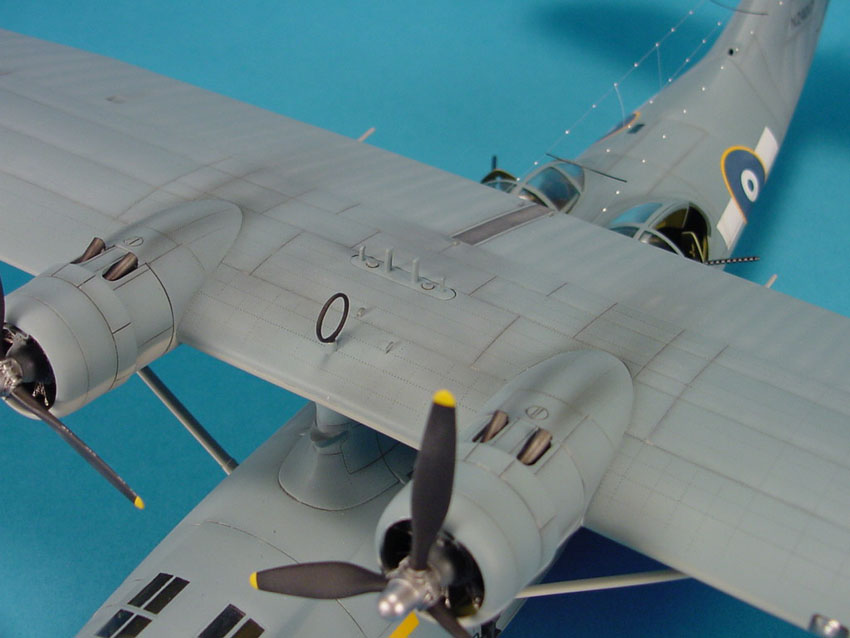
Once the decals were applied to the wings, I could actually get them to lift, by blowing across the surface of the decal. I had to resort to making my own replacements from decal film. The fact that the serials refused to settle was a blessing, as they were far too large in the first place. I made new serials of the correct size on my PC and printed them on clear Micro Scale decal film.
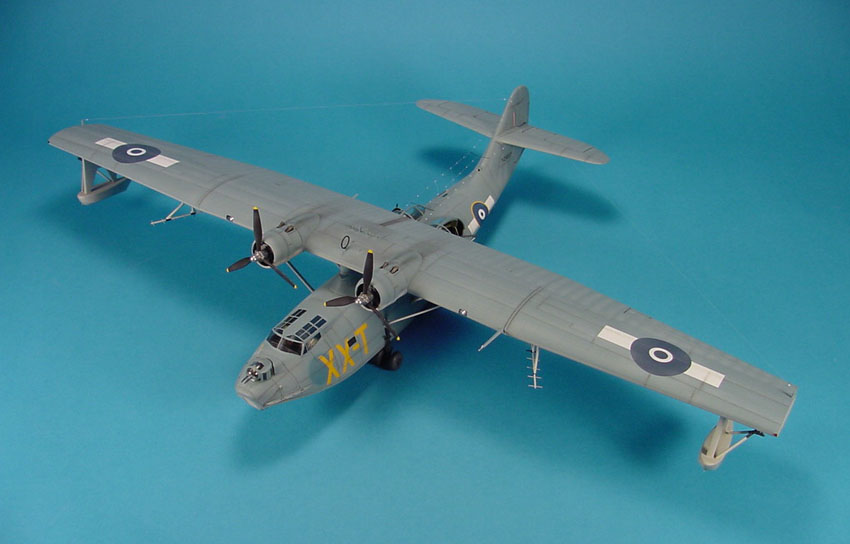
To replicate areas of wear on the upper surface of the wing, I ground up some regular pencil lead and rubbed it into the surface of the model. It does a great job of giving paint that scuffed, shiny look without drastically changing the colour. The wing was fastened in place and the beaching gear was painted and installed, so that I could finally get this model off its belly. To add more shading and weathering, various shades of grey and blue chalk pastels were applied to the panel lines and streaked back using a large sable brush. Traces of a waterline, which was made with a mix of light grey and lime green pastels, was lightly applied, as these aircraft were usually rinsed with fresh water after beaching.
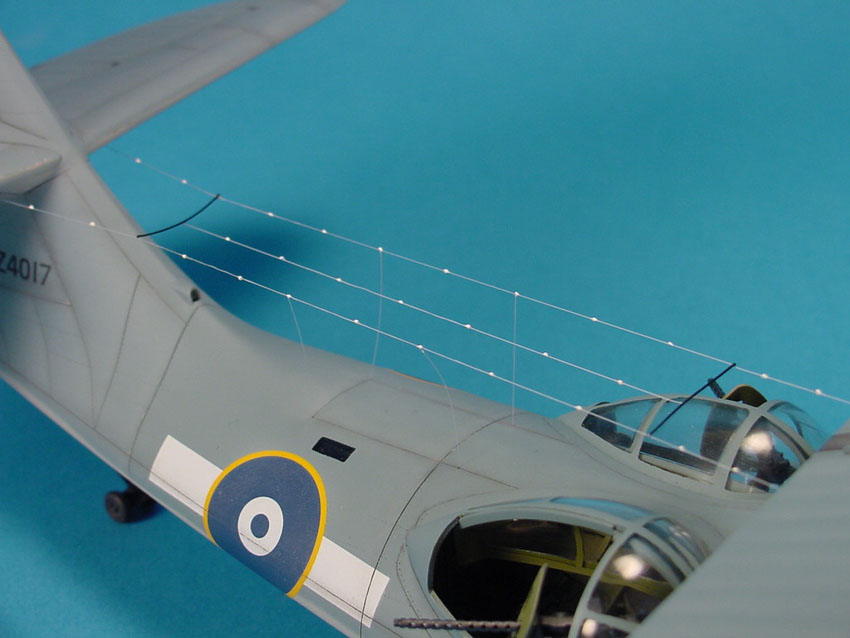
The antenna wires were made from stretched sprue and proved to be one of the most involved tasks during the completion of the model. The trickiest part was to evenly tighten the left and right wires that run from the wing to the tail planes. Too much heat or too little and the black cross braces would have been crooked. The numerous insulators were made from drops of white glue, which were painted gloss white when dry.
References
Detail
and Scale Vol. 66 PBY Catalina. Squadron Publications
Squadron
In Action No. 62 PBY Catalina. Squadron
Publications
Squadron
Walk Around No. 5 PBY Catalina. Squadron
Publications
![]()